
Home Improvement
Smart Tips for Removing Unused Structures and Creating a Cleaner Outdoor Space


Maintaining an attractive and functional outdoor space requires regular care, thoughtful planning, and occasional improvements. Over time, sheds, storage buildings, and other outdoor structures may become damaged, outdated, or unnecessary. These structures can occupy valuable space, affect the appearance of a property, and create maintenance challenges when they are no longer used for their original purpose. Removing unwanted buildings provides an opportunity to improve the layout, enhance safety, and make better use of the available area. With proper preparation and the right approach, shed removal can transform an overcrowded outdoor environment into a cleaner, more organized, and more practical space for everyday activities.
- Understanding the Importance of Removing Unused Structures
- Identifying Structures That Need Removal
- Planning a Successful Shed Removal Project
- Preparing the Area Before Work Begins
- Understanding the Structure Dismantling Process
- Choosing the Right Tools and Equipment
- Handling Different Types of Outdoor Structures
- Important Safety Considerations During Removal
- Understanding the Cost of Structure Removal
- Environmentally Responsible Waste Management
- Preparing the Ground for Future Improvements
- DIY Removal or Professional Assistance
- Choosing a Reliable Removal Service
- Making Better Use of Your Cleared Outdoor Space
- Conclusion
Understanding the Importance of Removing Unused Structures
Unused outdoor structures can gradually deteriorate when exposed to rain, wind, sunlight, and changing temperatures. Wooden panels may rot, metal surfaces can develop rust, and roofing materials may become loose or damaged. These problems can make an old structure less attractive and potentially unsafe, especially when its supporting framework has weakened. Removing a building that is no longer useful can eliminate these concerns and reduce the need for repeated repairs.Another important consideration is the amount of space an unused structure occupies. A large storage shed may prevent homeowners from expanding a garden, creating a comfortable seating area, or improving access to other parts of the property. Clearing unnecessary buildings gives property owners greater flexibility when planning landscaping and outdoor improvements. It can also make routine activities such as mowing, cleaning, and maintaining fences easier to manage.Removing unwanted structures may also improve the overall organization of a property. Old buildings sometimes become storage areas for broken equipment, unused furniture, damaged tools, and miscellaneous household items. These belongings can accumulate over time and make the surrounding environment appear cluttered. A well-planned removal project allows property owners to sort these items, dispose of unwanted materials responsibly, and create a more useful outdoor area.
Identifying Structures That Need Removal
The first step in improving an outdoor space is identifying which structures no longer serve a practical purpose. Some sheds may have been useful for storing gardening equipment or seasonal belongings, but changing household needs can make them unnecessary. Others may have become difficult to access, expensive to maintain, or unsuitable for storing valuable items. Evaluating how often a structure is used and whether it remains functional can help determine whether removal is the most appropriate option.Structural conditions should also be considered before making a decision. Look for visible signs of deterioration, including cracked panels, loose roofing, damaged supports, rusted fasteners, and weakened flooring. Water stains, persistent dampness, and unpleasant odors may indicate moisture problems that have affected the structure over time. If the building has become unstable, it should be assessed carefully before anyone attempts to dismantle it.The surrounding area can provide additional clues about whether a structure is worth keeping. Overgrown vegetation, restricted walkways, blocked drainage, and difficult access may indicate that the building is interfering with the property’s layout. Removing an unnecessary structure can create opportunities to reorganize the area and improve accessibility. A careful assessment helps property owners make decisions based on safety, functionality, and long-term plans rather than appearance alone.
Planning a Successful Shed Removal Project
Proper planning is essential for completing a removal project safely and efficiently. Before beginning, property owners should examine the structure’s size, construction materials, condition, and method of installation. A small plastic building may require a different approach from a large wooden shed or a metal structure secured to a concrete foundation. Understanding these details helps determine the tools, labor, transportation, and disposal arrangements needed for the project.Access is another important factor to evaluate. Narrow gates, nearby fences, trees, walls, and other obstacles may make it difficult to transport dismantled materials out of the work area. Overhead cables and underground utilities can also create safety concerns, particularly when foundation removal or excavation is involved. Identifying these potential complications in advance allows property owners to develop a suitable plan and avoid unnecessary delays.A realistic schedule should include preparation, dismantling, waste collection, transportation, and final cleanup. Property owners should also consider whether the project requires permits, specialist assessment, or coordination with utility providers. Requirements can vary according to the structure and applicable regulations, so it is important to confirm the relevant rules before work begins. Good planning makes the process more predictable and helps ensure that the finished area is ready for its next purpose.
Preparing the Area Before Work Begins
Preparing the surrounding space helps reduce the risk of accidents and property damage during dismantling. Begin by removing furniture, gardening equipment, decorative items, and other movable objects from the work area. Plants and landscaping features close to the structure may need temporary protection, particularly when large panels or heavy components will be moved. Keeping the immediate surroundings clear gives workers more room to operate tools and transport materials safely.The contents of the building should also be sorted before dismantling begins. Tools, containers, furniture, and other belongings may be suitable for reuse, donation, recycling, or ordinary disposal. Paints, fuels, pesticides, cleaning chemicals, and other potentially hazardous substances should be identified and handled according to their specific safety requirements. Removing these items beforehand makes it easier to inspect the interior and prevents them from becoming mixed with construction waste.It is also important to establish a safe working boundary around the structure. Children, pets, and unauthorized visitors should remain away from the area while dismantling is underway. Suitable barriers or warning signs may be necessary when the project takes place near a frequently used walkway. Preparing the work area properly helps create a safer environment and allows the project to proceed with fewer interruptions.
Understanding the Structure Dismantling Process
The dismantling process depends on the structure’s design, condition, and construction materials. Workers generally begin by examining the roof, walls, doors, windows, and supporting framework to determine how the building is assembled. This inspection helps identify unstable sections and establish a logical sequence for removing the components. Structures that have suffered significant deterioration may require additional precautions because removing one section can affect the stability of the remaining framework.Once the assessment is complete, detachable components may be removed first. Doors, windows, shelves, and fixtures can often be separated before dismantling the main structure. Roofing materials and wall panels are then removed using suitable tools and techniques. Working systematically helps prevent unexpected movement and reduces the risk of damaging nearby property. Heavy sections should never be removed without considering how their removal may affect the balance of the building.After the panels have been separated, workers can address the supporting framework and base. Some sheds rest on timber supports or concrete blocks, while others are secured to a concrete slab or another permanent foundation. Each arrangement requires an appropriate removal method. The process should be completed carefully to avoid damaging surrounding surfaces, underground services, or nearby landscaping. A structured dismantling sequence helps keep the work organized from beginning to end.
Choosing the Right Tools and Equipment
Using appropriate tools is essential for efficient dismantling and safe material handling. Common equipment may include screwdrivers, wrenches, pliers, pry bars, utility knives, and suitable power tools. Larger structures may require specialized lifting equipment or machinery, depending on their size and condition. Selecting equipment according to the materials and construction method helps reduce unnecessary effort and improves control during the project.Personal protective equipment is equally important. Safety glasses help protect the eyes from dust and flying particles, while suitable gloves reduce the risk of cuts from sharp metal edges, splintered timber, and fasteners. Sturdy footwear provides additional protection when moving heavy components across uneven ground. Hearing protection and appropriate respiratory equipment may also be necessary when using noisy tools or working in dusty conditions.Tools should be inspected before use, and workers should follow the manufacturer’s instructions when operating equipment. Damaged tools, unstable ladders, and unsuitable cutting equipment can increase the likelihood of accidents. Anyone unfamiliar with the equipment required for a complicated dismantling project should consider professional assistance rather than attempting unfamiliar tasks. Good equipment selection and careful handling support a safer and more efficient process.
Handling Different Types of Outdoor Structures
Wooden sheds are common because timber is versatile and relatively straightforward to work with. However, prolonged exposure to moisture can cause rot, weakening the boards and supporting framework. During dismantling, workers should watch for loose nails, splintered sections, damaged joints, and unstable roof supports. Sound timber may sometimes be reused for appropriate projects, while severely deteriorated pieces may need to be discarded through a suitable waste management service.Metal structures require particular care because panels and fasteners can develop sharp edges, especially when corrosion is present. Rusted bolts may be difficult to loosen, while thin sheets can bend or shift unexpectedly during removal. Appropriate gloves, eye protection, and suitable tools help reduce the risk of injury. Metal components may be recyclable through facilities that accept the relevant materials, making separation worthwhile when it can be performed safely.Plastic and resin structures may be lighter and easier to dismantle, but older panels can become brittle after prolonged exposure to sunlight and changing temperatures. Mixed-material buildings can present additional challenges because their timber, metal, plastic, and roofing components may require different handling methods. Assessing the materials before starting helps determine how they should be separated, transported, and disposed of responsibly.
Important Safety Considerations During Removal
Safety should remain a priority throughout the entire project. Dismantling an outdoor structure can involve falling debris, unstable walls, sharp fasteners, heavy panels, and power tools. Workers should avoid standing beneath unsupported roof sections or removing structural supports without understanding the potential consequences. If a building is partially collapsed or severely weakened, a qualified professional should assess the situation before dismantling begins.Potential hazards may also be hidden inside walls, beneath roofing materials, or around the foundation. Older structures can contain electrical wiring, deteriorated insulation, hazardous coatings, or materials that require specialist handling. Before disturbing electrical connections, the appropriate supply should be safely isolated by a qualified person where necessary. Underground utility services should also be considered before digging or breaking a foundation.Particular caution is required if asbestos-containing materials are suspected. Some older roofing products, wall panels, and insulation materials may contain asbestos depending on their age and construction history. These materials should not be cut, broken, drilled, or removed as part of an ordinary dismantling task. Qualified professionals can assess the materials and determine the appropriate testing, containment, and removal procedures. Taking safety concerns seriously helps protect workers, residents, and the surrounding environment.
Understanding the Cost of Structure Removal
The overall cost of a removal project depends on several factors, including the size of the building, the materials used, its condition, and the complexity of the work. A small plastic structure may require less labor and equipment than a large wooden building with a heavy roof and substantial supporting framework. Restricted access, nearby obstacles, and difficult transportation routes can also increase the time required to complete the work.Disposal requirements may contribute to the total expense. Different materials can have different collection, transportation, and processing costs. Recycling may be available for certain metals or other suitable materials, while contaminated or hazardous components may require specialized handling. If the structure contains numerous stored belongings, additional sorting and disposal services may also be necessary. Discussing these requirements before the project begins helps create a more realistic budget.Foundation removal should be considered separately when preparing an estimate. Dismantling the visible structure may be relatively straightforward, but removing a concrete slab or buried supports can require additional labor and equipment. Property owners should confirm whether the quotation includes the foundation, debris collection, transportation, disposal, and final site cleanup. A detailed written estimate makes it easier to compare services and avoid unexpected charges.
Environmentally Responsible Waste Management
Responsible disposal is an important part of any outdoor renovation project. Dismantling an unused building can produce timber, metal, plastic, roofing materials, fasteners, and concrete debris. Sending every component to general waste may overlook opportunities for recycling and reuse. Separating materials according to their composition helps identify suitable disposal options and can reduce the amount of waste sent to landfill.Timber in good condition may be reused for suitable projects, while accepted metal components can sometimes be taken to recycling facilities. Certain plastic products may also have recycling options, although acceptance depends on the material type and available facilities. Property owners should confirm the requirements of the intended recycling service before transporting materials. Items affected by hazardous substances, significant deterioration, or contamination should receive appropriate assessment before reuse or recycling is considered.Reuse can also help reduce unnecessary waste. Functional shelves, doors, hardware, and other removable components may be useful in workshops, storage areas, or future projects. However, damaged or unsafe materials should not be reused simply to avoid disposal costs. Careful sorting, responsible handling, and advance planning can make the project more environmentally considerate while keeping the work area organized.
Preparing the Ground for Future Improvements
Once the structure has been dismantled, the ground should be inspected before the area is used for another purpose. Small nails, screws, broken panels, and other debris may remain scattered across the surface. These materials should be collected carefully because they can cause injuries or damage gardening equipment. A thorough cleanup also makes it easier to evaluate the condition of the ground and identify any repairs that may be needed.The soil or existing base may have been affected by years of use. Ground beneath the building can be compacted, uneven, or poorly drained, while the surrounding area may contain gravel, concrete fragments, or remnants of the foundation. If the property owner plans to create a lawn or garden, the soil may need to be loosened, leveled, and improved before planting. If another structure is planned, the base should be prepared according to the requirements of the new installation.Drainage is another important consideration. Removing a building may change how rainwater flows across the area, particularly when the structure previously covered low ground or redirected water away from the foundation. Inspecting the cleared space after rainfall can help identify pooling or drainage concerns. Addressing these problems early supports better landscaping results and reduces the likelihood of future maintenance difficulties.
DIY Removal or Professional Assistance
Some property owners prefer to dismantle small structures themselves because they want to manage the project directly and reduce labor expenses. This approach may be reasonable when the building is lightweight, stable, easy to access, and free from suspected hazardous materials. With suitable tools, protective equipment, and a clear plan, a capable person may be able to complete a straightforward project. However, the work can become more complicated when fasteners are rusted, materials are damaged, or structural components are difficult to handle.Professional assistance may be more suitable for large, unstable, or complicated structures. Experienced workers can assess the construction, identify potential hazards, and determine the appropriate dismantling sequence. They may also provide waste transportation, material separation, and site cleanup as part of their service. Although professional assistance involves a cost, it can reduce the physical demands of the project and help manage situations that require specialized knowledge or equipment.Before choosing an approach, property owners should consider the time, tools, transportation, disposal fees, and possible repair expenses involved. They should also evaluate their ability to handle heavy components and work safely around potential hazards. If the structure contains suspected asbestos, electrical complications, or significant structural damage, specialist assistance should be obtained. Selecting an approach that matches the project’s complexity helps protect both people and property.
Choosing a Reliable Removal Service
Selecting a dependable service provider begins with reviewing experience, communication, and the range of services offered. Property owners should look for professionals who understand different construction materials and can explain how the work will be completed. Previous customer feedback and examples of similar projects can provide useful insight into workmanship and reliability. A professional provider should also be willing to discuss safety arrangements and identify possible complications before work begins.Request a written estimate that explains the full scope of the project. The quotation should clarify whether dismantling, labor, transportation, disposal, foundation removal, and cleanup are included. If the structure contains potentially hazardous materials or requires specialized equipment, these issues should be discussed before an agreement is made. Clear documentation helps property owners compare estimates fairly and understand which services are covered by the quoted price.It is also helpful to discuss scheduling, site access, and protection for surrounding features. The contractor should consider nearby fences, plants, pathways, buildings, and utility connections when planning the work. Arrangements for transporting materials and keeping debris contained should also be established. Choosing a provider who prioritizes careful planning, transparent communication, and responsible disposal can make the entire project more manageable.
Making Better Use of Your Cleared Outdoor Space
Once an unwanted structure has been removed and the ground prepared, property owners can begin planning how to use the available space. A garden may provide an opportunity to grow flowers, vegetables, or decorative plants, while a lawn can create an open area for outdoor activities. A seating area with suitable furniture can make the space more comfortable for relaxing and entertaining. The best option depends on the property’s layout, maintenance requirements, and the needs of the household.Storage requirements should also be considered before deciding how the cleared space will be used. If additional storage is still necessary, a smaller or more durable replacement structure may be a better option than rebuilding the original building. Property owners should consider the dimensions, access requirements, materials, and maintenance needs of any new installation. Planning carefully can help prevent the same space limitations from returning in the future.Landscaping improvements can make the area look more complete. Leveling the ground, improving drainage, adding pathways, or introducing suitable plants can create a more organized appearance. It is useful to establish a realistic maintenance routine before selecting features that require regular attention. Thoughtful planning helps turn the cleared area into a functional extension of the property rather than leaving it unused or poorly maintained.
Conclusion
Removing an unused outdoor structure can improve safety, reduce clutter, and create opportunities for landscaping, storage improvements, and other property upgrades. A successful project requires careful inspection, practical planning, suitable equipment, and responsible waste management. Preparing the work area, identifying potential hazards, and understanding the construction materials can help prevent unnecessary damage and make the process more efficient.Professional shed removal can be especially helpful when a structure is large, unstable, difficult to access, or supported by a substantial foundation. Experienced workers can assist with dismantling, material handling, disposal, and site preparation while helping property owners manage the project’s practical challenges. By choosing appropriate removal methods and paying attention to safety throughout the process, property owners can transform an unused structure into an opportunity for a cleaner, more attractive, and more functional outdoor environment.

Introduction
An unused room can become one of the most valuable spaces in a home when it is designed around the way you live. A spare bedroom, a section of a home gym, or an underused extension can offer the opportunity to create a private wellness area without undertaking a complete home renovation.
- 1. Look at the Room as a Complete Space
- 2. Decide Which Type of Sauna Suits Your Lifestyle
- 3. Make Florida’s Climate Part of the Plan
- 4. Choose Materials That Create the Right Atmosphere
- 5. Plan Lighting and Controls Before Installation
- 6. Think Beyond the Sauna Cabin
- 7. Understand the Professional Installation Process
- Benefits of Adding a Home Sauna
- Conclusion
A sauna can form the centre of that space, but its success depends on more than the cabin itself. Room dimensions, heating technology, electrical planning, ventilation, and interior finishes all influence the result.
For homeowners considering sauna installation Orlando, a custom approach makes it possible to work with the property’s existing layout instead of adapting daily routines around a standard unit.
1. Look at the Room as a Complete Space
Before choosing a sauna, consider how the entire room will function. You may want the sauna to be the main feature, or you may prefer a more balanced arrangement that includes seating, storage, and space for changing.
Start by measuring the available floor area and ceiling height. Check the doorways and access route to ensure the sauna components can reach the installation location. Consider the position of nearby walls, windows, and existing utilities.
A compact layout can work well when space is limited. Larger rooms offer more flexibility for additional benches or complementary wellness features.
The aim is to avoid filling every available corner. Leave suitable access around the sauna for entry, maintenance, and any clearances required by the manufacturer.
WellnessPro offers custom sauna design and fabrication, allowing the dimensions and layout to be planned around the property. Its design process can include 3D renderings, helping homeowners review the proposed arrangement before fabrication begins.
2. Decide Which Type of Sauna Suits Your Lifestyle
The heating system is one of the most important decisions because it affects the experience, equipment requirements, and design of the cabin.
Traditional electric sauna
A traditional sauna uses a heater to warm the enclosed room. Depending on the selected equipment, water can be added to suitable sauna stones to create additional humidity.
This style may suit homeowners who prefer a conventional sauna environment with wooden benches and a classic interior.
The heater must be appropriately sized for the room and installed according to the manufacturer’s specifications. The design should also account for clearances, controls, and electrical requirements.
Infrared sauna
An infrared sauna uses infrared heating technology rather than the same room-heating approach used by a traditional sauna. It offers an alternative for homeowners who prefer this style of heat.
An infrared sauna Orlando can be designed to suit a spare room, dedicated wellness suite, or home gym. Cabin dimensions, seating, controls, and finishes can be selected according to the available space and intended use.
Neither option is automatically better for every household. Compare the operating instructions, equipment specifications, installation requirements, and personal preferences before making a decision.
3. Make Florida’s Climate Part of the Plan
Orlando’s warm, humid summers make moisture management an important consideration when designing a home wellness space. An indoor sauna still needs appropriate ventilation and construction details, even though it is protected from direct rain.
The surrounding room should be suitable for the installation. Discuss how the proposed sauna will affect airflow, nearby finishes, and maintenance requirements.
Outdoor installations require additional attention to weather exposure, drainage, and exterior materials. The foundation, roof protection, ventilation, and any required anchoring should suit the site and applicable local building requirements.
WellnessPro plans custom saunas for Central Florida homes with attention to humidity-aware construction and ventilation. A professional assessment can help identify the details needed for your chosen location.
Planning these requirements before fabrication is easier than trying to correct problems after the cabin has been installed.
4. Choose Materials That Create the Right Atmosphere
The materials inside a sauna influence its appearance and the overall feeling of the room. Wood can create a warm, natural contrast with the cooler finishes often found in modern homes.
WellnessPro offers several wood options, including Canadian cedar, Nordic spruce, and hemlock.
Canadian cedar has a distinctive grain and natural aroma. Nordic spruce provides a lighter appearance, while hemlock can suit a more understated design.
Your choice should reflect the home’s interior, personal preferences, and the intended application of each material. Interior paneling, benches, and exterior components may have different requirements, so discuss the full specification with the installer.
Glass can also change the appearance of a sauna. A glazed door or panel may help the cabin feel more open, while a more enclosed design can provide a different visual style. The final arrangement should balance aesthetics, privacy, and the manufacturer’s safety requirements.
5. Plan Lighting and Controls Before Installation
Lighting can make a wellness room feel like a considered part of the home rather than a separate utility space.
Soft ambient lighting can establish a relaxed atmosphere. Optional chromotherapy lighting provides another customization choice, while smart controls may offer convenient operation when compatible with the selected equipment.
Sound preparation can also be considered if you want to include audio in the wider wellness area.
These features are easier to coordinate during the design stage. Electrical connections, control placement, and equipment compatibility should be confirmed before construction begins.
Avoid adding features simply because they are available. A practical setup with reliable heating, suitable ventilation, comfortable seating, and well-planned lighting may serve you better than an unnecessarily complicated system.
6. Think Beyond the Sauna Cabin
A dedicated wellness room can include additional features if the space and budget allow. The important thing is to create a layout that supports your routine without becoming crowded.
For example, a nearby shower may be useful for convenience. A small changing area can help keep towels and clothing organized. A comfortable chair outside the sauna provides a place to sit, while built-in storage can reduce clutter.
Some homeowners may also consider a cold plunge or a home gym as part of a larger wellness project. These additions require their own space, electrical or plumbing planning, and maintenance considerations.
WellnessPro also provides cold plunge and broader wellness-space solutions. Discussing the overall room plan at the beginning can help coordinate the different elements and avoid having to redesign the space later.
7. Understand the Professional Installation Process
A custom sauna project usually involves several connected stages.
Consultation and assessment: The installer reviews your intended use, preferred location, available space, and design priorities.
Design development: Dimensions, materials, seating, heating equipment, and optional features are selected. Renderings can help you visualize the proposed result.
Fabrication and preparation: The selected components are prepared, and the site is checked for the required access, utilities, and installation conditions.
Installation and commissioning: The sauna is assembled, the relevant components are checked, and the equipment is commissioned according to the manufacturer’s requirements.
WellnessPro provides an end-to-end approach that includes design, fabrication coordination, installation, and final commissioning. Depending on the project, permits and electrical work may also need to be coordinated in accordance with local requirements.
The schedule depends on the size, materials, equipment, and site readiness. Confirm the expected timeline and exactly what the quotation includes before approving the project.
Benefits of Adding a Home Sauna
A well-planned sauna can offer several practical advantages for homeowners.
- Convenience: Enjoy a dedicated wellness space without travelling to a spa or fitness centre.
- Personalized design: Select the size, heating system, wood finish, and seating arrangement to suit your home.
- Better use of unused space: Transform a suitable spare room or home gym into a functional area.
- Privacy: Use the sauna in a familiar setting according to your own routine.
- A coordinated home environment: Integrate the sauna with storage, lighting, a shower, or other wellness features.
Sauna use should follow the manufacturer’s instructions. Stay hydrated and leave the sauna if you feel dizzy or unwell. If you have medical concerns, consult a qualified healthcare professional before regular use.
Conclusion
Turning an unused room into a wellness suite requires thoughtful planning, but the result can be a practical addition to everyday home life. Choosing the right heating system, selecting appropriate materials, and addressing ventilation and electrical requirements early can help you avoid unnecessary complications.
Whether you prefer a traditional cabin or an infrared setup, custom design allows the sauna to fit the space you actually have.
If you are considering sauna installation in Orlando, WellnessPro can help you explore the available designs, materials, and installation requirements. Contact the team to discuss an infrared sauna in Orlando or a complete home wellness space tailored to your property.

- What Does Full Service Removals Actually Mean?
- What’s Included in a Full Service Move?
- How Much Do Full Service Removalists Cost in Sydney?
- Full Service vs DIY vs Hire a Truck: Which Wins?
- How to Choose the Right Full Service Removalist in Sydney
- Why Sydney Moves Especially Need Full Service
- FAQs
- What is the difference between full service and standard removals?
- How far in advance should I book removalists in Sydney?
- Do full service removalists pack everything?
- Is transit insurance worth it?
- Can I get a fixed price instead of an hourly rate?
- Ready to Move Without the Stress?
Moving house in Sydney is stressful enough without doing all the heavy lifting yourself. That is where full service removalists Sydney come in. Instead of packing boxes for weeks, hiring a truck, and begging friends to help on moving day, a full service team handles everything from the first box to the last piece of furniture in your new home.
But what exactly does “full service” include? How much does it cost in Sydney? And how do you pick the right team? This guide answers all of it.
What Does Full Service Removals Actually Mean?
A full service removalist does not just show up with a truck. The team manages your entire move from start to finish. You point at what needs to go, and they take care of the rest.
With full service removalists Sydney, you do not lift a single box. The crew brings packing materials, wraps your belongings, loads the truck, drives to your new address, unloads everything, and can even unpack for you. It is the closest thing to a stress free move.
This is very different from a standard removalist, who usually only loads, transports, and unloads. With full service, the packing, the materials, and the careful handling of fragile items are all part of the deal.
What’s Included in a Full Service Move?
Every company defines its package a little differently, but a proper full service move in Sydney should include:
- Professional packing. Trained packers wrap your kitchenware, electronics, artwork, and furniture using quality materials. Fragile items get extra protection.
- Packing materials supplied. Boxes, bubble wrap, packing paper, tape, and mattress covers are all provided. You do not need to buy anything.
- Furniture disassembly and reassembly. Beds, tables, and large wardrobes are taken apart for safe transport and put back together at the other end.
- Loading and transport. The team loads the truck in the right order so nothing shifts or breaks during the drive.
- Unloading and placement. Boxes and furniture go into the correct rooms, not just dumped at the front door.
- Unpacking service (optional). Many Sydney removalists offer unpacking as an add on, so you can walk into a liveable home on day one.
- Transit insurance options. Your belongings are covered while they are in the team’s hands.
Before you book, ask for the inclusions in writing. A trustworthy company will list exactly what is covered and what costs extra.

Removalists carefully loading boxes onto the truck
How Much Do Full Service Removalists Cost in Sydney?
Price depends on the size of your home, the distance, and how much packing you need. As a rough guide for Sydney in 2026:
- 1 bedroom apartment: $600 to $1,100
- 2 bedroom home: $900 to $1,600
- 3 bedroom house: $1,300 to $2,200
- 4 bedroom house: $1,800 to $3,000+
These are full service prices, so packing labour and materials are built in. A standard (non packing) move for the same homes would cost roughly 30 to 40 percent less, but then you are doing all the packing yourself.
The biggest cost drivers are access issues (stairs, no lift, long carry distances), the volume of belongings, and peak day surcharges. Moving on a Saturday or at month end in Sydney almost always costs more than a midweek move.
To avoid surprises, always get a fixed written quote after an inspection or a detailed inventory. The cheapest quote on the phone often grows on moving day. If you want honest pricing with no hidden fees, get a free moving quote and compare it against two others before you decide.
Full Service vs DIY vs Hire a Truck: Which Wins?
Doing it yourself looks cheaper until you add everything up. Truck hire in Sydney runs $150 to $300 a day, plus fuel, plus boxes and wrap (easily $200+), plus the value of your time and the risk of injury or damage.
Then there is the hidden cost: a DIY move usually takes two to three times longer. Packing a 3 bedroom house properly takes one person about 3 to 4 full days. A professional team does it in one.
Backloading (sharing truck space) is cheaper for interstate moves but you lose control over timing. Your belongings travel on someone else’s schedule.
For local Sydney moves, full service wins on total value once you count your time, the packing materials, and the lower damage risk. For interstate moves from Sydney, compare full service against backloading based on how flexible your dates are.
How to Choose the Right Full Service Removalist in Sydney
Sydney has hundreds of removalists, and quality varies wildly. Use this checklist:
1. Check reviews across platforms. Look at Google reviews with attention to how the company responds to complaints, not just the star rating.
2. Confirm they are insured. Ask what transit insurance is included and what it covers.
3. Get everything in writing. The quote should list inclusions, the truck size, the team size, and arrival windows.
4. Ask about their team. Are they trained employees or day hire labour? It matters for how your belongings are treated.
5. Watch for red flags. No physical address, cash only payments, or quotes given without asking a single question about your home are all warning signs.
A good removalist will ask about stairs, parking access, and fragile items before quoting. If they do not ask, they are guessing, and you will pay for that guess later.
Why Sydney Moves Especially Need Full Service
Sydney is not an easy city to move in. Narrow streets in the Inner West, high rise apartments with strict lift booking rules in the CBD, steep driveways on the North Shore, and limited parking in the Eastern Suburbs all make DIY moves painful.
Professional teams deal with these problems daily. They know which buildings need lift bookings, how to protect common areas from damage claims, and how to load a truck so it survives Sydney traffic and tight turns.
If you are moving into or out of a strata building, check the by laws for moving hours and lift bookings before moving day. Your removalist should remind you of this, but many do not.
FAQs
What is the difference between full service and standard removals?
Full service includes professional packing, materials, disassembly, transport, unloading, and optional unpacking. Standard removals usually cover loading, transport, and unloading only, and you handle all the packing yourself.
How far in advance should I book removalists in Sydney?
Book 2 to 4 weeks ahead for a normal move, and 4 to 6 weeks ahead for month end, Saturdays, or the December to January peak. Last minute bookings are possible but you will pay more and get less choice.
Do full service removalists pack everything?
Yes, unless you tell them otherwise. Most people ask the team to skip personal documents, valuables, and anything they want to transport themselves. Just point out what stays with you before packing starts.
Is transit insurance worth it?
Yes. Even the best teams can hit a pothole or brake hard in Sydney traffic. Transit insurance is cheap compared to replacing a damaged TV or dining table. Ask what is included as standard and what the upgrade options are.
Can I get a fixed price instead of an hourly rate?
Yes, and you should. Fixed quotes protect you from slow work and traffic delays. Make sure the fixed price is based on a proper inventory or inspection, not a guess over the phone.
Ready to Move Without the Stress?
A full service move costs more upfront than doing it yourself, but most Sydney families find it pays for itself in saved time, avoided damage, and pure peace of mind. The key is choosing a team with real reviews, proper insurance, and a written fixed quote.
Start with a free, no obligation quote and see exactly what your move would cost. It takes two minutes and there is no pressure to book.
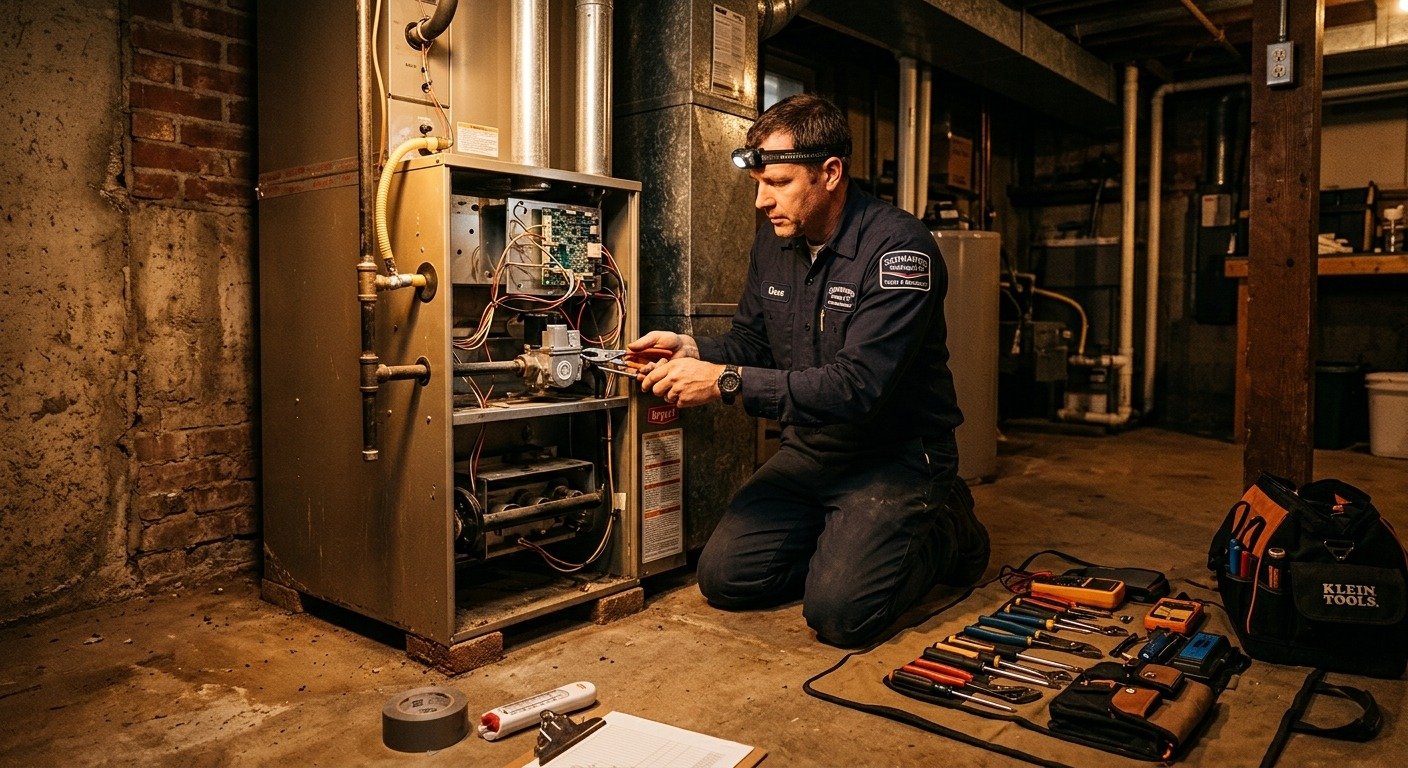
Winter doesn’t give second chances when your furnace quits in the middle of the night. One moment you’re cozy on the couch, and the next you’re bundled in blankets, watching your breath fog up in your own living room. For homeowners across the region, a malfunctioning furnace isn’t just an inconvenience — it’s a genuine safety concern, especially when temperatures drop below freezing.
- What Are the Most Common Signs a Furnace Needs Repair?
- Strange Noises Coming From the Unit
- Uneven Heating Throughout the Home
- Rising Energy Bills Without Explanation
- Frequent Cycling On and Off
- Yellow Burner Flame Instead of Blue
- Why Does Professional Furnace Repair Matter So Much?
- How Often Should Furnaces Be Inspected or Serviced?
- What Should Homeowners Expect During a Furnace Repair Visit?
- Why Choose Schwantes Heating and Air Conditioning, Inc. for Your Heating Needs?
- Keep Your Home Warm This Season
- Frequently Asked Questions
At Schwantes Heating and Air Conditioning, Inc., we’ve spent years helping families stay warm through harsh winters. We understand that a furnace breakdown rarely happens at a convenient time. It’s usually during the coldest night of the year, right before a holiday gathering, or just as guests are about to arrive. That’s why knowing the warning signs of furnace trouble matters so much, and why having a trusted team on speed dial can make all the difference.
This post walks through the most common furnace problems homeowners face, explains why professional attention matters, and shows you how Schwantes Heating and Air Conditioning, Inc. approaches every repair with care, skill, and respect for your home.
What Are the Most Common Signs a Furnace Needs Repair?
Furnaces rarely fail without warning. Most systems give off subtle clues well before a complete breakdown occurs. Catching these signs early can save homeowners from costly emergency calls and uncomfortable nights.
Strange Noises Coming From the Unit
A healthy furnace runs with a soft hum, not a symphony of bangs, rattles, or squeals. Banging sounds often point to a delayed ignition, where gas builds up before igniting. Squealing can indicate a worn belt or motor bearing in need of lubrication. Rattling might simply mean a loose panel, but it could also signal something more serious inside the blower assembly.
Uneven Heating Throughout the Home
If one room feels like a sauna while another feels like a walk-in freezer, your furnace or ductwork may not be distributing air evenly. This often results from blocked vents, a failing blower motor, or ductwork that has come loose over time.
Rising Energy Bills Without Explanation
Furnaces lose efficiency as components wear down. A sudden spike in heating costs, especially when usage habits haven’t changed, often points to a system working harder than it should to produce the same amount of heat.
Frequent Cycling On and Off
Short cycling, when a furnace turns on and off repeatedly without completing a full heating cycle, puts unnecessary strain on internal components. It can stem from a dirty air filter, a malfunctioning thermostat, or an oversized unit that was never properly matched to the home’s square footage.
Yellow Burner Flame Instead of Blue
A healthy gas furnace burns with a crisp blue flame. A yellow or flickering flame can indicate incomplete combustion, which may lead to dangerous carbon monoxide buildup. This sign should never be ignored, and a technician should be called right away.
Why Does Professional Furnace Repair Matter So Much?
Furnace systems combine gas lines, electrical components, and mechanical parts working together under pressure and heat. A small oversight during a DIY repair attempt can lead to bigger problems, including gas leaks, electrical hazards, or voided manufacturer warranties.
Professional technicians bring diagnostic tools and training that go beyond what most homeowners have access to. They can pinpoint the exact cause of a malfunction rather than guessing based on symptoms alone. This precision saves time, money, and frustration in the long run.
There’s also a safety dimension that can’t be overstated. Gas furnaces, when not properly maintained or repaired, pose risks ranging from carbon monoxide exposure to fire hazards. Choosing a trained, licensed professional protects both your home and the people living in it.
How Often Should Furnaces Be Inspected or Serviced?
Most heating professionals recommend an annual inspection, ideally performed in early fall before the heating season begins. Regular maintenance catches small issues before they become expensive repairs and extends the overall lifespan of the unit.
During a typical maintenance visit, a technician will check the heat exchanger for cracks, test the thermostat’s accuracy, inspect electrical connections, clean the blower components, and verify that the system is operating at the manufacturer’s recommended efficiency level. Homeowners who stay consistent with annual service visits often avoid the stress of mid-winter breakdowns entirely.
What Should Homeowners Expect During a Furnace Repair Visit?
A trustworthy furnace repair experience starts with clear communication. Technicians should explain what they find, outline available options, and provide upfront pricing before any work begins. There shouldn’t be any guesswork or pressure involved in the process.
At Schwantes Heating and Air Conditioning, Inc., every service call begins with a thorough inspection of the entire heating system, not just the symptom the homeowner reported. This comprehensive approach often reveals underlying issues that, left unaddressed, could cause repeat breakdowns. Technicians walk homeowners through their findings in plain language, answer questions patiently, and never leave a job site until the homeowner feels confident in the work performed.
Why Choose Schwantes Heating and Air Conditioning, Inc. for Your Heating Needs?
Homeowners have plenty of choices when searching for a heating company, so trust has to be earned. Schwantes Heating and Air Conditioning, Inc. has built a reputation on reliability, honest pricing, and a genuine commitment to keeping families comfortable throughout the colder months.
Fast, reliable, and affordable Furnace Repair keeps your home warm and your family safe all winter long, and that commitment shapes every decision our technicians make on the job. From the moment a service call comes in, our team prioritizes quick response times because we know that a cold home can quickly become an unsafe one. Every technician on staff undergoes ongoing training to stay current with the latest furnace models and repair techniques, ensuring that whether your system is brand new or decades old, it’s in capable hands.
Beyond the technical expertise, what sets Schwantes Heating and Air Conditioning, Inc. apart is the way we treat every home like our own. Technicians wear shoe covers, clean up after every job, and take the time to answer questions without rushing. We believe that heating repair should feel straightforward and stress-free, not confusing or overwhelming.
Our pricing structure also reflects that same philosophy. Before any repair begins, homeowners receive a clear, upfront estimate with no hidden fees buried in the fine print. We’d rather build long-term relationships with our customers than make a quick profit on a single visit, and that approach has kept families coming back to us year after year.
Keep Your Home Warm This Season
A furnace that’s struggling to keep up doesn’t just make your home less comfortable. It can drive up energy costs, shorten the lifespan of your heating system, and in some cases, create real safety risks for your household. Paying attention to the warning signs, scheduling regular maintenance, and partnering with a team you trust can make all the difference when temperatures drop.
If your furnace has been acting up, or if it’s simply been a while since your last inspection, now is a smart time to schedule service before winter settles in for good. Schwantes Heating and Air Conditioning, Inc. is ready to help keep your home warm, safe, and comfortable all season long.
Frequently Asked Questions
How much does furnace repair typically cost?
Costs vary depending on the specific issue, the age of the unit, and the parts required. Minor repairs like thermostat replacements tend to cost less, while major component failures, such as a cracked heat exchanger, can run higher. A technician can provide an accurate estimate after inspecting the unit.
Is it better to repair or replace an old furnace?
Generally, if a furnace is under ten years old and the repair cost is reasonable, repair is the more cost-effective choice. For older units facing frequent breakdowns, replacement may offer better long-term value through improved efficiency and fewer repair calls.
How long does a typical furnace repair take?
Most repairs can be completed within a single visit, often within one to three hours, depending on the complexity of the issue and parts availability.
Can a furnace be repaired in freezing temperatures?
Yes, furnace repairs can be performed regardless of outdoor temperature. Technicians are trained to work efficiently to restore heat as quickly as possible, especially during emergency situations.

Baitullah Butt of Eurouplift on Winning Visibility in the Age of AI Search

Piano Moving:Guide to Safe Handling, Professional Transport, and Long-Term Protection

What Is Newslikeyou.com? Topics, Features, and Content Guide

Alex Pettyfer Net Worth, Wife, Age, Height, Children, Career and More

Brad Williams Net Worth, Wife, Height, Age, Daughter, Family, Career and More

Eldorado.gg Review 2026: How It Works, Safety, Fees, and Risks
-
Celebrity10 months ago
Alex Pettyfer Net Worth, Wife, Age, Height, Children, Career and More
-
Celebrity10 months ago
Brad Williams Net Worth, Wife, Height, Age, Daughter, Family, Career and More
-
Blog2 months ago
Eldorado.gg Review 2026: How It Works, Safety, Fees, and Risks
-
 Anime11 months ago
Sanzoku Bandits of One Piece: Origins, Higuma, and Their Role in Dawn Island
-
 Celebrity10 months ago
John McGinn Net Worth, Age, Height, Wife, Childrens, Career and More
-
 Celebrity10 months ago
Frances de la Tour Net Worth, Age, Height, Husband, Childrens, Career and More
-
 Celebrity10 months ago
Will Trickett Net Worth, Wife, Childrens, Age, Career and More
-
 Blog2 months ago
Crackstube: A Complete Guide to the Digital Publishing Platform