
Home Improvement
A Complete Guide to Grind and Seal Concrete Flooring, Preparation, Benefits, Maintenance, and Long-Lasting Results

Introduction
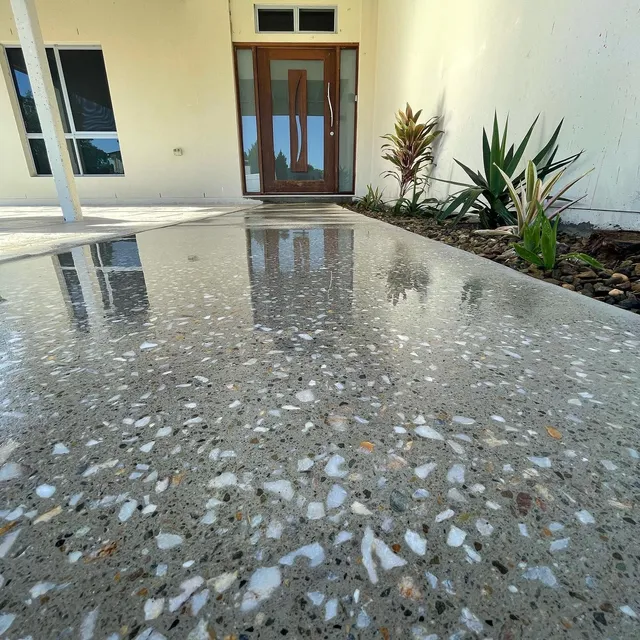
Concrete is one of the most widely used flooring materials because of its strength, versatility, and ability to support demanding environments. However, unfinished concrete can develop dust, stains, surface imperfections, and a dull appearance over time. A properly prepared and sealed surface can improve both the appearance and practical performance of concrete while preserving its natural character. grind and seal is a flooring process that combines mechanical surface preparation with the application of a protective coating or sealer. The process can expose the attractive characteristics of concrete while creating a surface that is easier to clean and maintain. Understanding preparation, equipment, sealer selection, installation, maintenance, and long-term care can help property owners make informed decisions about this type of flooring solution.
- Introduction
- Understanding the Process
- Importance of Concrete Preparation
- Choosing the Right Grinding Equipment
- Controlling Dust During Preparation
- Selecting the Appropriate Sealer
- Creating the Desired Appearance
- Improving Durability
- Improving Cleanability
- Addressing Cracks and Surface Imperfections
- Managing Moisture
- Application of the Sealer
- Allowing Proper Curing
- Safety During the Process
- Maintenance After Installation
- Repairing Sealed Concrete
- Suitable Applications
- Advantages Over Unfinished Concrete
- Considering Long-Term Value
- Final Thoughts
Understanding the Process
The basic concept behind this flooring method is relatively straightforward, but successful results depend on careful preparation and correct application. The concrete surface is first mechanically ground to remove surface contaminants, weak material, stains, old coatings, and minor imperfections. After the desired level of preparation has been achieved, the surface is thoroughly cleaned before a suitable sealer is applied. The sealer helps protect the concrete against moisture, staining, abrasion, and everyday wear. Depending on the selected product, the final finish may appear natural, matte, satin, or glossy. A professionally completed grind and seal system can therefore provide a balance between the natural appearance of concrete and the protection offered by a finished surface.
Importance of Concrete Preparation
Preparation is one of the most important stages because the quality of the substrate directly affects the performance of the sealer. Concrete may contain dust, grease, oil, old paint, adhesives, surface latitude, or other contaminants that can interfere with proper adhesion. Mechanical grinding helps remove many of these unwanted materials and creates a suitable surface for the sealer to bond with. The concrete should also be inspected for cracks, holes, damaged areas, and other defects before coating begins. Repairs may be necessary where significant imperfections are present. Proper preparation gives the sealing material a stronger foundation and can reduce the likelihood of premature peeling, uneven appearance, or other surface problems.
Choosing the Right Grinding Equipment
Different grinding machines and diamond tooling can be used depending on the condition and hardness of the concrete. Larger equipment may be appropriate for broad areas, while smaller machines and edge grinders can be useful around corners and difficult-to-reach sections. Diamond tooling is available in different configurations and grit levels, allowing contractors to control how aggressively the surface is prepared. The selected equipment should match the condition of the concrete and the desired finished appearance. Using inappropriate tooling can result in uneven preparation or unnecessary surface removal. A professional grind and seal project begins with selecting equipment capable of preparing the substrate efficiently while maintaining consistent results.
Controlling Dust During Preparation
Mechanical grinding can generate substantial amounts of fine concrete dust if appropriate dust-control methods are not used. Professional equipment is often paired with industrial vacuum systems designed to collect dust during the grinding process. Effective dust management improves visibility, reduces cleanup, and helps protect workers and nearby occupants from airborne particles. It can also prevent dust from settling back onto the prepared surface before the sealer is applied. The work area should be managed carefully throughout the preparation process. Proper dust control contributes to a cleaner installation and helps ensure that contaminants do not interfere with the final bond between the concrete and protective sealer.
Selecting the Appropriate Sealer
The sealer is an important part of the overall system because it provides the protective layer over the prepared concrete. Different sealers can provide different levels of stain resistance, abrasion resistance, chemical resistance, moisture protection, and visual enhancement. Some products are designed to preserve a natural appearance, while others can produce a more noticeable glossy finish. The intended use of the floor should guide the selection process. A surface exposed to heavy traffic or frequent spills may require a more durable product than one used in a lightly trafficked area. Choosing the right grind and seal coating helps ensure that the finished floor is suited to the conditions it will experience.
Creating the Desired Appearance
One of the benefits of sealing prepared concrete is the ability to enhance its natural appearance without completely covering the characteristics of the substrate. Grinding can reveal subtle variations in the aggregate and concrete surface, while the sealer can add depth and clarity. Different levels of grinding and different sealers can produce noticeably different visual results. Some installations aim for a natural appearance, while others use a high-gloss coating to create a more polished look. The final appearance should be discussed before work begins so that preparation and sealer selection are aligned with the desired outcome.
Improving Durability
Concrete is naturally strong, but an unprotected surface can still be affected by staining, moisture, abrasion, and everyday use. A suitable sealer can create an additional protective barrier that helps reduce the impact of these conditions. The level of protection depends on the type of sealer, application thickness, substrate condition, and expected traffic. Heavy equipment, sharp objects, chemicals, and extreme abrasion can still cause damage even when a protective coating is present. A properly planned grind and seal system can nevertheless improve the practical performance of concrete and reduce some of the maintenance challenges associated with untreated surfaces.
Improving Cleanability
Sealed concrete is generally easier to maintain than porous, unfinished concrete. Dirt and spills are less likely to penetrate deeply into a properly sealed surface, making routine cleaning more manageable. Regular sweeping or dust removal can prevent abrasive particles from accumulating, while suitable cleaning solutions can address everyday spills and stains. Cleaning products should be compatible with the selected sealer because harsh chemicals or abrasive methods may damage the protective layer. Establishing a consistent maintenance routine helps preserve the appearance and performance of the finished surface. A well-maintained grind and seal floor can remain functional and attractive with relatively straightforward cleaning practices.
Addressing Cracks and Surface Imperfections
Grinding can remove certain surface imperfections, but it does not automatically resolve structural cracks or significant damage. Before sealing, the concrete should be inspected carefully for cracks, holes, spalling, uneven sections, and other defects. Minor imperfections may sometimes be repaired using compatible materials, while larger problems may require more extensive work. It is important to understand the difference between cosmetic surface defects and movement-related structural issues. If cracks continue to move, they may eventually become visible through the finished coating. Addressing appropriate repairs before applying the sealer can help create a more consistent and durable grind and seal finish.
Managing Moisture
Moisture is an important consideration when applying sealers to concrete. Excessive moisture beneath or within the slab can affect adhesion and may contribute to blistering, cloudiness, peeling, or other coating problems. Before installation, the condition of the substrate should be evaluated using appropriate methods. Environmental conditions such as temperature and humidity can also influence how the sealer cures. The manufacturer’s requirements should be followed carefully regarding moisture limits and application conditions. Managing moisture before installation is considerably easier than attempting to correct a coating failure after the finished surface has been installed.
Application of the Sealer
Once grinding, cleaning, and repairs have been completed, the sealer can be applied according to the product manufacturer’s instructions. Application methods may include rollers, brushes, sprayers, or specialized equipment depending on the selected material. Coverage should remain consistent so the finished surface does not develop visible variations, excessive buildup, or areas of insufficient protection. The installer should also consider working time and environmental conditions to maintain a consistent appearance across the entire floor. Some systems require multiple coats, with appropriate curing or recoat periods between applications. Careful application helps the grind and seal system achieve the intended protective and decorative characteristics.
Allowing Proper Curing
Curing is an important stage that should not be rushed. A newly sealed floor may appear dry while the coating continues to develop its final properties. Walking on the surface, moving heavy equipment, or exposing it to moisture too early can interfere with the curing process. The required curing time depends on the specific sealer, temperature, humidity, ventilation, and application conditions. The manufacturer’s instructions should always determine when the floor can safely receive foot traffic and heavier use. Allowing sufficient curing time gives the coating an opportunity to achieve its intended hardness and protective characteristics.
Safety During the Process
Safety should be considered throughout both grinding and sealing operations. Mechanical grinding can create dust and noise, while some sealers may require appropriate ventilation and protective equipment. Workers should use suitable eye protection, hearing protection, respiratory protection, gloves, and other equipment required for the materials and equipment involved. Electrical tools should be operated according to appropriate safety procedures, and the work area should be controlled to prevent unauthorized access. Product safety information should be reviewed before handling coatings or cleaning materials. A professional grind and seal project should protect workers and occupants while maintaining a controlled environment for quality installation.
Maintenance After Installation
Regular maintenance helps preserve the finished surface and can extend the useful life of the sealer. Dust and dirt should be removed regularly because abrasive particles can gradually wear the coating under repeated foot or vehicle traffic. Spills should be addressed promptly, especially when they involve oils, chemicals, or staining substances. Cleaning products should be compatible with the sealer, and abrasive pads should be avoided unless specifically recommended. Heavy furniture and equipment should also be moved carefully to reduce the risk of scratching or impact damage. A consistent grind and seal maintenance routine can help keep the floor clean and attractive while protecting the coating from unnecessary wear.
Repairing Sealed Concrete
Even well-maintained floors may eventually develop areas of wear or damage. Scratches, chips, peeling, stains, or worn sections should be inspected to determine their cause and severity. Small areas may be repairable without treating the entire floor, although the repair material should be compatible with the existing sealer. Matching the appearance of an older surface can sometimes be challenging because the original coating may have changed slightly through use and exposure. Prompt repairs can prevent minor defects from becoming more extensive. Periodic inspection is therefore useful for maintaining the condition of a grind and seal surface over the long term.
Suitable Applications
Sealed concrete can be appropriate for many spaces where a durable and relatively easy-to-maintain surface is desired. Potential applications include garages, workshops, retail areas, offices, storage spaces, utility areas, commercial interiors, and other suitable environments. The appropriate sealer should always be selected according to the conditions of the specific application. Areas exposed to heavy traffic, chemicals, moisture, or equipment may require specialized products. The expected use should be evaluated before installation rather than assuming that one sealer will perform equally well in every environment. Proper planning helps ensure that the finished surface meets the practical requirements of the space.
Advantages Over Unfinished Concrete
Unfinished concrete can be functional, but it may produce dust, absorb spills, and develop stains more easily. Sealing the prepared surface can address some of these issues while improving the visual appearance. The process can also preserve the natural character of concrete rather than completely covering it with another flooring material. Compared with more complex flooring systems, a grind and seal approach can offer a relatively straightforward way to enhance an existing slab. The actual benefits depend on the condition of the concrete and the quality of the installation. Proper expectations are important because sealing cannot correct every structural or substrate problem.
Considering Long-Term Value
When evaluating a flooring solution, it is useful to consider the entire lifecycle rather than focusing only on initial installation costs. Equipment, preparation, repairs, sealer selection, labor, maintenance, and future recoating can all contribute to the total investment. A properly maintained sealed concrete surface may provide useful service for an extended period before significant restoration is needed. However, performance depends on the conditions of the environment and the quality of the original installation. Choosing suitable materials and following a consistent maintenance plan can improve long-term value. A well-planned grind and seal system can provide a practical combination of appearance, protection, and manageable maintenance.
Final Thoughts
Concrete flooring can be transformed through careful mechanical preparation and the application of a suitable protective sealer. The process can improve the appearance of the slab while helping protect it from stains, moisture, abrasion, and everyday wear. Successful results depend on surface preparation, dust control, crack repair, moisture assessment, appropriate equipment, sealer selection, proper application, and adequate curing. Regular cleaning and timely repairs can further preserve the finished surface. When the process is carefully planned and performed according to the requirements of the substrate and coating, grind and seal can provide a durable, attractive, and practical flooring solution for many suitable applications.
Home Improvement
How Regular Pool Repair and Maintenance Can Help Protect Your Swimming Pool Investment

A swimming pool is a valuable addition to a property, but keeping it in good condition requires regular care and attention. Daily use, changing weather conditions, water chemistry, equipment operation, and normal aging can gradually affect the pool structure and its supporting systems. Small cracks, leaks, damaged tiles, worn equipment, and circulation problems may appear minor at first but can become more complicated when they are ignored. Pool repair provides a practical way to address these concerns and restore the proper function of damaged components. A consistent maintenance strategy combined with timely repairs can help preserve the appearance, performance, safety, and long-term value of a swimming pool.
- Understanding the Importance of Pool Maintenance
- Recognizing Early Signs of Damage
- Inspecting the Pool Structure
- Addressing Water Loss
- Maintaining the Pool Pump
- Keeping Filters Efficient
- Inspecting Plumbing and Valves
- Maintaining Pool Heating Equipment
- Caring for Pool Surfaces and Tiles
- Maintaining Pool Decking and Surrounding Areas
- Maintaining Proper Water Chemistry
- Preventing Equipment Damage
- Understanding Electrical Safety
- Creating a Preventive Maintenance Schedule
- Choosing Professional Repair Assistance
- Considering Repair or Replacement
- Managing Long-Term Maintenance Costs
- Protecting the Overall Pool Investment
- Final Thoughts
Understanding the Importance of Pool Maintenance
Regular maintenance is essential because a swimming pool consists of many connected components that must work together. The pump circulates water, the filter removes suspended particles, chemical systems help maintain water quality, and plumbing moves water between different parts of the system. The pool shell, surface, tiles, coping, decking, and equipment also require periodic inspection. Pool repair becomes easier when maintenance routines identify problems before they become severe. Regularly checking the condition of equipment and surfaces can help property owners understand how their pool normally operates and recognize unusual changes that may indicate a developing problem.
Recognizing Early Signs of Damage
Many pool problems provide warning signs before a major failure occurs. Unexpected water loss, unusual pump sounds, reduced water circulation, cloudy water, damaged tiles, cracks, staining, loose fittings, or changes in equipment pressure may all deserve attention. Pool repair can often be more manageable when a problem is identified during its early stages. Waiting until a component completely fails can increase the amount of labor and materials required to restore the system. Property owners should therefore observe both the physical condition of the pool and the behavior of its mechanical equipment. Early identification allows maintenance decisions to be made before a minor concern develops into a larger issue.
Inspecting the Pool Structure
The pool structure is constantly exposed to water pressure, chemicals, temperature changes, and environmental conditions. Depending on construction materials, surfaces may develop cracks, chips, discoloration, rough areas, or other signs of deterioration. Pool repair may involve addressing localized surface damage, restoring damaged areas, or investigating cracks that could indicate a deeper structural concern. Not every imperfection represents a serious problem, so proper assessment is important before deciding on a repair method. Regular inspections can help distinguish normal cosmetic aging from damage that may affect water retention, durability, or the structural performance of the pool.
Addressing Water Loss
Water loss can be caused by normal evaporation, splashing, maintenance activities, or a genuine leak. When water levels drop unusually quickly or require frequent topping up, the cause should be investigated. Pool repair can help correct leaks affecting the pool shell, plumbing, fittings, equipment, or other parts of the circulation system. Finding the source may sometimes be challenging because water can travel through surrounding materials before becoming visible. A professional inspection may be appropriate when simple observations cannot identify the problem. Addressing water loss promptly can help prevent unnecessary water usage and reduce the possibility of moisture-related damage.
Maintaining the Pool Pump
The circulation pump is one of the most important mechanical components because it moves water through the filter, heater, and other parts of the system. Problems may include unusual noises, reduced pressure, overheating, leaks, vibration, or failure to start. Pool repair may involve replacing worn seals, bearings, motors, electrical components, or other parts depending on the cause. Keeping the pump basket clean and ensuring that water can enter the pump properly can help reduce unnecessary strain. If a pump repeatedly develops the same issue, the underlying cause should be investigated instead of repeatedly replacing individual parts without determining why the failure is occurring.
Keeping Filters Efficient
Filters help remove dirt, dust, oils, and other suspended particles from circulating pool water. A dirty or damaged filter can restrict water flow and make the circulation system work harder. Pool repair may be necessary when filter housings, valves, cartridges, internal components, or other parts become damaged. Regular filter maintenance can reduce the likelihood of serious problems and support consistent water circulation. Different filtration systems require different cleaning procedures, so maintenance should be performed according to the specific equipment design. Monitoring pressure readings can also help identify when a filter requires cleaning, inspection, or replacement.
Inspecting Plumbing and Valves
The plumbing system connects the pool to pumps, filters, heaters, drains, and return points. Leaks, damaged pipes, worn seals, faulty valves, and blocked lines can interfere with water movement and may cause equipment to operate inefficiently. Pool repair can include replacing damaged fittings, repairing accessible plumbing, renewing seals, or correcting valve problems. Some leaks may be difficult to locate because sections of plumbing can be installed underground or behind other structures. Visible connections should be inspected regularly for moisture, dripping, corrosion, or other signs of deterioration. Early attention can reduce the risk of a small plumbing issue developing into a more extensive problem.
Maintaining Pool Heating Equipment
Pool heating systems can improve comfort but contain several components that require proper maintenance. Problems may involve sensors, controls, heat exchangers, water flow, electrical connections, or other internal components. A heater that does not maintain the desired temperature or repeatedly shuts down should be inspected rather than continuously restarted. Pool repair involving heating equipment may require specialized knowledge because certain systems involve electrical components, fuel, combustion, and water. Professional service can help identify the actual source of the problem and ensure that repairs are performed according to appropriate safety requirements. Regular inspection can also help identify worn components before they cause complete system failure.
Caring for Pool Surfaces and Tiles
The interior finish of a swimming pool contributes significantly to its appearance and can also affect the feel of the surface during use. Tiles may crack, loosen, stain, or become damaged, while other finishes may develop discoloration, rough areas, or deterioration. Pool repair can involve replacing individual tiles, restoring damaged sections, repairing joints, or addressing broader surface problems. Prompt attention can help prevent loose materials from becoming a safety concern or allowing water to reach vulnerable areas. When replacement materials are needed, selecting compatible products can help preserve the appearance and performance of the existing surface.
Maintaining Pool Decking and Surrounding Areas
The area around a pool is exposed to water, sunlight, foot traffic, temperature changes, and cleaning products. Over time, decking can crack, become uneven, stain, or deteriorate. Damaged areas may create trip hazards and can also interfere with proper drainage around the pool. Pool repair projects may sometimes include work on surrounding surfaces when deterioration affects safety or water management. The appropriate solution depends on the decking material, extent of damage, drainage requirements, and desired appearance. Keeping the surrounding area in good condition is an important part of maintaining the overall functionality and appearance of the pool environment.
Maintaining Proper Water Chemistry
Water chemistry is another important aspect of pool maintenance because improperly balanced water can affect both swimmers and equipment. Poor chemical balance can contribute to scaling, corrosion, staining, cloudy water, and deterioration of certain surfaces. Pool repair may become necessary when prolonged chemical problems contribute to damage affecting equipment or finishes. Regular testing can help property owners monitor important chemical conditions and make appropriate adjustments. Chemical treatment should be combined with effective filtration and circulation because chemicals do not replace the need to physically remove suspended particles. A balanced maintenance routine can help protect both water quality and pool components.
Preventing Equipment Damage
Preventive maintenance can reduce the likelihood of unexpected equipment failure. Pump baskets should be kept clear, filters should be maintained, valves should be inspected, and visible connections should be checked periodically. Pool repair is generally more straightforward when worn or damaged components are identified before they affect connected equipment. Operating pumps, heaters, or filtration systems outside their recommended conditions can increase wear and reduce service life. Property owners should follow equipment instructions regarding operating schedules, cleaning procedures, and maintenance intervals. Keeping equipment areas clean and properly ventilated can also contribute to more reliable operation.
Understanding Electrical Safety
Many pools include electrical equipment such as pumps, heaters, lighting systems, timers, automation controls, and other accessories. Because these components operate near water, electrical maintenance requires particular care. Pool repair involving wiring, control panels, electrical connections, or internal electrical components should be handled by appropriately qualified professionals when specialized knowledge is required. Attempting unfamiliar electrical repairs can create serious safety risks. Regular inspection can help identify visible signs of damage or malfunction, but complex electrical issues should be diagnosed and corrected using appropriate professional procedures. Safety should always take priority when water and electrical systems are involved.
Creating a Preventive Maintenance Schedule
A structured maintenance schedule can make it easier to keep track of the condition of a swimming pool. Regular tasks may include checking water chemistry, cleaning filters, emptying pump baskets, inspecting surfaces, observing water levels, checking equipment performance, and examining visible plumbing connections. Pool repair can then be arranged when inspections reveal issues that require attention. Keeping written records of maintenance activities can help identify recurring problems and provide useful information when professional service is required. A preventive approach is often more effective than waiting until several components fail at the same time. Consistent attention can also make maintenance costs easier to plan.
Choosing Professional Repair Assistance
Some basic pool maintenance tasks can be completed by experienced property owners, but complicated problems may require professional assistance. Structural cracks, underground leaks, electrical faults, major plumbing problems, heater failures, and internal equipment damage can be difficult to diagnose without suitable tools and technical knowledge. Pool repair performed by an experienced professional can help identify the actual cause rather than simply addressing the most visible symptom. When choosing a service provider, property owners can consider experience, workmanship, communication, repair methods, materials, warranties, and maintenance recommendations. Clear explanations can help owners understand what work is necessary and why.
Considering Repair or Replacement
Not every damaged component should be repaired repeatedly. Older pumps, severely damaged filters, extensively corroded parts, deteriorated surfaces, and repeatedly failing equipment may eventually become more practical to replace. Pool repair remains useful when a component is structurally sound and can be restored effectively. However, repeated repairs to an aging component may result in ongoing expenses without providing reliable long-term performance. A professional assessment can help determine whether repair, partial replacement, or complete replacement is appropriate. Considering the age, condition, repair history, and expected future performance of a component can help property owners make practical maintenance decisions.
Managing Long-Term Maintenance Costs
Regular maintenance can help reduce the likelihood of unexpected and expensive failures. Addressing small leaks, worn seals, damaged tiles, clogged filters, and unusual equipment behavior early may prevent additional components from being affected. Pool repair costs can vary depending on the type and extent of damage, so early diagnosis may make it easier to plan necessary work. Property owners can also maintain records of previous repairs, replacement parts, and equipment age to help anticipate future maintenance requirements. Comparing repair options based on durability and long-term value rather than focusing only on initial cost can support better financial planning.
Protecting the Overall Pool Investment
A swimming pool represents an investment in both property value and personal enjoyment, so maintaining its condition is important. Regular inspections and timely attention to problems can help protect the structural components, mechanical equipment, surfaces, and surrounding areas. Pool repair can restore damaged parts while helping prevent small problems from becoming more extensive. Combining repairs with preventive cleaning, water testing, equipment inspections, and professional servicing when necessary creates a more complete maintenance strategy. A proactive approach can also improve the pool’s appearance and reliability while reducing the likelihood of unexpected disruptions during periods when the pool is being used frequently.
Final Thoughts
Regular care is essential for keeping a swimming pool functional, attractive, and dependable over the long term. Pumps, filters, plumbing, heaters, surfaces, tiles, electrical equipment, and surrounding areas can all experience wear through normal use and environmental exposure. Pool repair provides an effective way to address damaged components and restore proper operation when problems occur. By monitoring warning signs, following a consistent maintenance schedule, maintaining appropriate water chemistry, and seeking professional assistance for complicated issues, property owners can protect their pool investment. A proactive maintenance strategy can help extend equipment life, reduce avoidable expenses, and support a cleaner and more enjoyable swimming environment for years to come.
Home Improvement
How Gas Fireplace Repair Can Restore Performance, Improve Safety, and Extend the Life of Your Fireplace
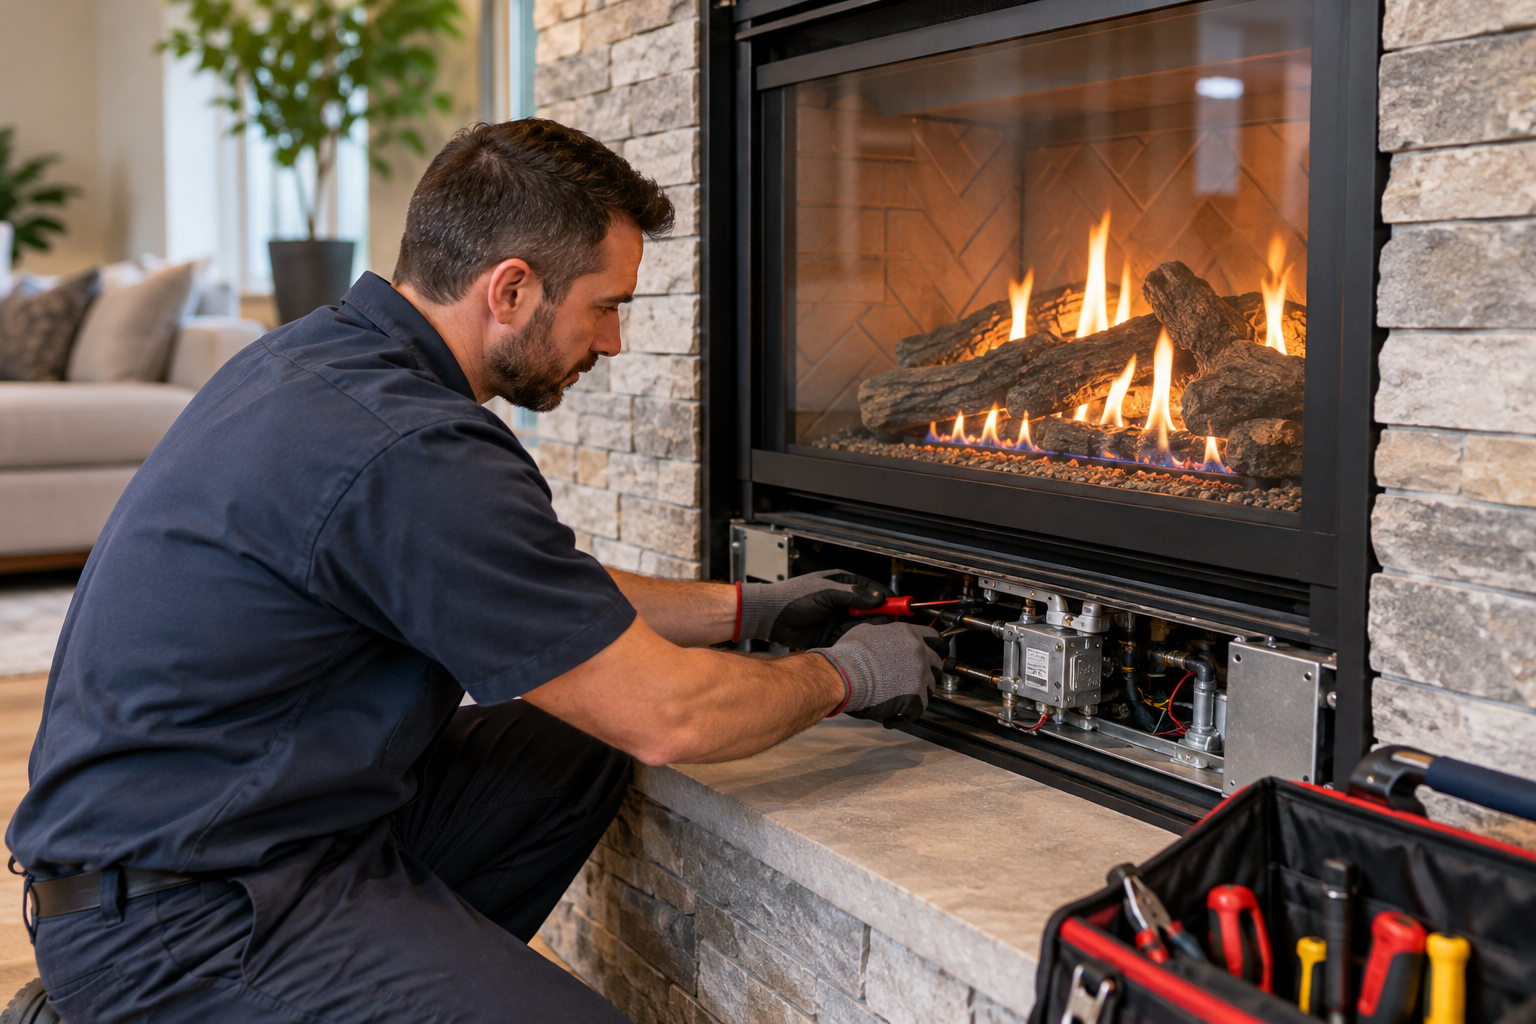
A gas fireplace can add warmth, comfort, and visual appeal to a home while offering a convenient alternative to a traditional wood-burning fireplace. Like any fuel-burning appliance, however, a gas fireplace contains several mechanical, electrical, and combustion-related components that require proper care. Burners, pilot assemblies, ignition systems, valves, controls, glass panels, and ventilation components can all experience wear or develop problems over time. Ignoring unusual sounds, inconsistent flames, ignition failures, or other warning signs may allow a minor issue to become more complicated. Professional gas fireplace repair can help identify the actual cause of a problem and restore the appliance to proper operating condition while preserving important safety features.
- Understanding Gas Fireplace Components
- Recognizing Common Warning Signs
- Dealing With Pilot Light Problems
- Troubleshooting Ignition Failures
- Examining Burner Performance
- Checking Gas Valves and Controls
- Understanding Ventilation Concerns
- Responding to Unusual Odors
- Addressing Soot and Discoloration
- Inspecting Gas Connections
- Caring for Fireplace Glass
- Checking Gas Logs and Decorative Materials
- When Professional Service Is Necessary
- Preventive Maintenance Practices
- Improving Fireplace Performance
- Practicing Safe Operation
- Choosing the Right Repair Solution
- Long-Term Fireplace Care
- Final Thoughts
Understanding Gas Fireplace Components
Understanding the basic components of a gas fireplace can make it easier to recognize potential problems. Most systems include a gas supply, control valve, burner assembly, ignition mechanism, and some form of safety control. Depending on the model, a fireplace may also include a pilot light, thermocouple, thermopile, electronic ignition module, remote control, thermostat, or specialized venting system. Each component has a specific function, but they must all work together for the fireplace to operate correctly. A problem with one part can sometimes affect several other functions. This is why gas fireplace repair should involve proper diagnosis rather than simply replacing the component that appears to be malfunctioning.
Recognizing Common Warning Signs
A gas fireplace can provide several clues when something is not working correctly. The appliance may fail to ignite, the pilot light may repeatedly go out, or the burner may produce a flame that looks different from normal. Homeowners might also notice unusual clicking, popping, or hissing sounds during operation. Excessive soot, unexpected odors, or difficulty controlling the flame can also indicate that the system requires attention. Not every unusual symptom has the same cause, so homeowners should avoid making assumptions based only on appearance. When these warning signs occur, professional gas fireplace repair can help determine whether the problem involves the ignition system, burner, fuel supply, controls, ventilation, or another component.
Dealing With Pilot Light Problems
Many gas fireplaces use a pilot assembly to ignite the main burner. If the pilot does not remain lit, the fireplace may fail to operate properly even when the gas supply is available. Several factors can contribute to repeated pilot problems, including a dirty pilot opening, a faulty thermocouple, a weak thermopile, gas-pressure concerns, or problems with the control system. The manufacturer’s instructions should always be followed when attempting basic pilot operation. If the pilot repeatedly goes out after appropriate operation procedures have been followed, continued attempts to restart it may not solve the underlying issue. Professional gas fireplace repair can identify the cause and determine whether the pilot assembly or another related component requires cleaning, adjustment, or replacement.
Troubleshooting Ignition Failures
Modern fireplaces may use electronic ignition systems instead of a continuously burning pilot. These systems can include batteries, switches, wiring, ignition modules, sensors, and control boards. If a fireplace clicks but does not ignite, there may be an issue with the ignition source, gas delivery, control signal, or another component. In some cases, a weak battery may be responsible, while more complicated problems require professional testing. Homeowners should never bypass safety switches or modify electrical connections simply to make the fireplace operate. Proper gas fireplace repair involves checking the ignition sequence and determining where the process is failing before replacing any parts.
Examining Burner Performance
The burner is responsible for distributing gas so that it can burn properly and produce the intended flame pattern. A burner that is dirty, damaged, blocked, or receiving an incorrect fuel supply may produce an uneven, weak, or unusual flame. Flame appearance can also be affected by problems with the air and gas mixture or by incorrectly positioned decorative logs. Homeowners should not drill, enlarge, block, or modify burner openings in an attempt to change flame height or appearance. If the burner is not operating normally, a qualified professional can inspect its condition and verify that it is receiving the appropriate fuel supply. Gas fireplace repair may include cleaning, adjustment, component replacement, or other corrective work depending on the actual cause.
Checking Gas Valves and Controls
Gas valves and control systems are essential because they regulate how fuel reaches the burner. A malfunctioning valve may prevent the fireplace from receiving gas correctly or may cause inconsistent operation. Control problems can also occur in systems that use wall switches, remote controls, thermostats, or electronic modules. Because these components are connected to the appliance’s fuel and safety systems, they should not be modified without appropriate expertise. If the fireplace does not respond properly to its controls, repeated attempts to force operation should be avoided. Professional gas fireplace repair can determine whether the issue involves the valve, wiring, control module, switch, remote system, or another component.
Understanding Ventilation Concerns
Proper ventilation is essential for a fuel-burning appliance because combustion creates gases and byproducts that must be managed according to the fireplace’s design. Vented fireplaces rely on an appropriate venting system, while other models have different ventilation requirements. A damaged, blocked, disconnected, or improperly configured vent can affect fireplace performance and safety. Changes in flame appearance, unusual odors, or visible residue may sometimes indicate a ventilation or combustion problem. Homeowners should never block vents or make unauthorized changes to the exhaust system. When ventilation is suspected, gas fireplace repair should include an appropriate evaluation of the appliance and its venting components.
Responding to Unusual Odors
An unexpected gas odor around a fireplace should always be treated seriously. Gas-burning appliances require secure connections and properly functioning components, and an unusual smell may indicate a potential leak or another condition requiring immediate attention. Homeowners should not use matches, lighters, or other flames to search for a leak. They should follow appropriate safety procedures and contact the relevant qualified service or emergency provider when necessary. The appliance should remain off until the situation has been evaluated. Once the immediate concern has been addressed, gas fireplace repair may be needed to locate and correct the underlying issue.
Addressing Soot and Discoloration
Soot or unusual blackening around a gas fireplace should not automatically be considered normal. Excessive soot may indicate incomplete combustion, incorrect burner operation, improper log placement, restricted airflow, or another problem with the appliance. The exact cause can vary depending on the design and condition of the fireplace. Simply wiping away the visible residue without determining why it appeared may allow the underlying problem to continue. A qualified technician can examine the burner, logs, fuel supply, and ventilation system to determine the source of the discoloration. Professional gas fireplace repair can then address the identified problem instead of treating only the visible symptom.
Inspecting Gas Connections
Gas connections are another important part of fireplace safety and performance. Connections must be secure and compatible with the appliance and fuel system. Over time, components may become damaged or deteriorated, particularly if the fireplace has been moved, modified, or improperly serviced. Any suspected leak, damaged connector, or unusual smell should receive immediate professional attention. Homeowners should never use an open flame to test a gas connection. Qualified technicians can use appropriate procedures and equipment to evaluate the fuel system. If a problem is identified, gas fireplace repair may involve correcting the connection, replacing a damaged component, or addressing another issue affecting fuel delivery.
Caring for Fireplace Glass
Many gas fireplaces have specially designed glass panels that separate the combustion area from the room while allowing the flames to remain visible. These panels and their seals are important parts of the appliance and should be handled carefully. Cracked, chipped, or damaged fireplace glass should not be used because the glass assembly is designed for the specific heat and operating conditions of the fireplace. Cleaning should only be performed according to the manufacturer’s instructions and when the appliance is completely cool. Ordinary household glass should never be substituted for fireplace-rated components. If the glass, frame, or seal is damaged, professional service may be required.
Checking Gas Logs and Decorative Materials
Gas logs are designed to work with a particular burner and must be arranged according to the manufacturer’s instructions. Moving logs into an incorrect position can affect flame patterns and combustion. Decorative materials such as ember products may also have specific placement requirements. If the logs are damaged, displaced, or producing unexpected flame behavior, the fireplace should be inspected rather than rearranged randomly. A technician can verify that the logs and decorative components are correctly positioned and compatible with the burner. Proper positioning is particularly important when gas fireplace repair involves unusual flames, soot, or changes in combustion behavior.
When Professional Service Is Necessary
Some basic maintenance can be performed by homeowners, but many gas fireplace problems require professional attention. Repeated ignition failures, persistent pilot problems, unusual odors, damaged gas components, excessive soot, abnormal flames, or control failures should not be ignored. Gas appliances involve fuel and combustion, so incorrect repairs can create additional hazards. Qualified professionals can inspect the appliance, test components, and use manufacturer information to determine the appropriate repair procedure. Professional service is particularly important when a problem involves the gas supply, burner, valve, ignition system, or safety controls.
Preventive Maintenance Practices
Preventive maintenance can help identify developing problems before they result in a complete fireplace failure. Depending on the model and manufacturer recommendations, maintenance may involve inspecting the burner, pilot assembly, ignition components, controls, glass, gas connections, decorative materials, and venting system. The area around the fireplace should also remain free of unnecessary combustible materials. Homeowners should keep the manufacturer’s instructions available and follow the recommended maintenance schedule. Regular inspections cannot guarantee that components will never fail, but they can help identify visible deterioration and unusual operating conditions. Including gas fireplace repair and inspection in a broader maintenance routine can help preserve dependable performance.
Improving Fireplace Performance
A well-maintained fireplace can generally operate more consistently than one with dirty burners, damaged components, restricted ventilation, or faulty controls. Performance depends on the appliance design, fuel supply, burner condition, venting, and operating habits. Homeowners should not modify the gas controls or burner in an attempt to produce more heat. If the fireplace seems weaker than usual or takes longer to reach its normal operating condition, professional evaluation can help identify the cause. Appropriate gas fireplace repair can restore affected components to their intended condition while preserving the safety features built into the appliance.
Practicing Safe Operation
Safe operation should continue after any repair has been completed. Homeowners should follow the manufacturer’s instructions whenever the fireplace is used and should avoid operating it in ways that contradict those instructions. Furniture, curtains, decorations, paper, and other combustible materials should be kept away from areas exposed to heat. Children and pets should also be protected from hot surfaces and active flames. Carbon monoxide detectors should be properly maintained in homes with fuel-burning appliances. If the fireplace begins behaving differently from normal, it should be turned off and evaluated rather than repeatedly operated in the hope that the issue will disappear.
Choosing the Right Repair Solution
Different fireplace problems require different solutions. A dirty pilot assembly may need cleaning, while a failed ignition module may require replacement. A damaged vent may require correction, while a malfunctioning gas valve may require specialized service. Proper diagnosis is therefore more valuable than replacing parts based solely on symptoms. Homeowners can ask qualified technicians to explain what caused the problem, which component needs attention, and what repair is recommended. Understanding the repair can also help prevent similar problems in the future. A careful gas fireplace repair process focuses on restoring the complete system rather than simply addressing the most noticeable symptom.
Long-Term Fireplace Care
A gas fireplace can remain a valuable and attractive feature when it receives appropriate attention throughout its service life. Homeowners can support long-term performance by keeping the appliance clean, following operating instructions, monitoring flame behavior, and arranging professional inspections when necessary. Unauthorized modifications should be avoided, particularly when they involve burners, valves, ignition systems, or ventilation. Keeping records of previous service can also help technicians diagnose future problems more efficiently. Consistent maintenance and timely gas fireplace repair can help address developing issues before they become more complicated and expensive.
Final Thoughts
A gas fireplace combines comfort and convenience with a sophisticated collection of fuel, mechanical, electrical, and safety components. Because the appliance involves combustion, unusual behavior should always be taken seriously rather than ignored. Pilot failures, ignition problems, weak flames, soot, damaged glass, unusual odors, and control issues can have several possible causes and require appropriate diagnosis. Regular maintenance, safe operating habits, and qualified professional service can help keep the fireplace functioning as intended. When problems occur, timely gas fireplace repair can restore performance, protect important components, and help extend the useful life of the fireplace while maintaining appropriate safety practices.
Home Improvement
Everything Homeowners Need to Know About Planning and Managing a Long-Lasting Roof Replacement
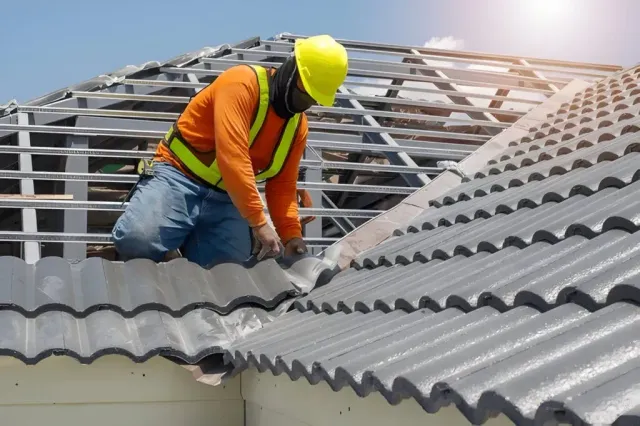
A roof is one of the most important protective elements of any home because it shields the interior from rain, wind, sunlight, moisture, and changing weather conditions. Over time, roofing materials naturally become exposed to wear, and even a well-maintained roof can eventually reach the end of its useful life. When repairs become frequent or the roofing system develops widespread deterioration, replacing it may be a practical long-term solution. A roof replacement is a major investment that requires careful planning, suitable materials, professional installation, and ongoing maintenance. Understanding the process can help homeowners prepare for the work and make informed decisions. From identifying early warning signs to choosing materials and planning maintenance, every stage can influence the performance and longevity of the finished roofing system.
- Recognizing the Signs of Roof Deterioration
- Understanding When Repairs Are No Longer Enough
- Starting With a Professional Roof Inspection
- Choosing Suitable Roofing Materials
- Preparing the Home Before Construction
- Removing the Existing Roofing System
- Inspecting and Repairing the Roof Deck
- Installing Quality Underlayment
- Paying Attention to Flashing
- Improving Roof Ventilation
- Managing Water and Roof Drainage
- Selecting an Experienced Roofing Team
- Considering Energy Efficiency
- Improving the Exterior Appearance
- Preparing for Weather Exposure
- Understanding the Project Timeline
- Managing Construction Debris
- Understanding Roofing Costs
- Maintaining the New Roofing System
- Protecting the Investment
- Planning for Long-Term Performance
- Making an Informed Decision
- Conclusion
Recognizing the Signs of Roof Deterioration
Aging roofing materials can show several signs that indicate the system may need significant attention. Missing, cracked, curling, or damaged shingles can expose underlying layers to moisture and sunlight. Dark stains, water marks, damaged flashing, and recurring leaks may also indicate problems that should not be ignored. In some situations, damage can occur beneath the visible roofing surface and remain unnoticed until it begins affecting the interior of the home. A professional inspection can provide a more complete understanding of the roof’s condition. Homeowners should consider the age of the roof, previous repairs, visible deterioration, and the extent of any water damage before deciding what type of work is appropriate. Early assessment can make planning easier and help prevent minor concerns from becoming larger structural problems.
Understanding When Repairs Are No Longer Enough
Not every roofing problem requires complete replacement. Isolated damage can often be addressed through targeted repairs, particularly when the rest of the roofing system remains in good condition. However, repeated leaks, widespread deterioration, extensive material damage, or an aging roof may make continued repairs less practical. A professional evaluation can help determine whether repairing individual areas will provide a suitable long-term solution. When a roof has multiple recurring problems, replacing the entire system may provide an opportunity to address underlying weaknesses at the same time. A roof replacement should therefore be considered based on the overall condition rather than one isolated issue. Understanding this distinction can help homeowners avoid unnecessary work while also preventing them from spending repeatedly on repairs that provide only temporary results.
Starting With a Professional Roof Inspection
A thorough inspection is an important first step before beginning any major roofing project. Professionals can examine visible roofing materials, flashing, valleys, roof edges, vents, gutters, drainage areas, and other components. They may also look for evidence of moisture penetration, deteriorated decking, inadequate ventilation, or structural concerns. Some issues are difficult to identify without examining areas that are normally covered by roofing materials. The inspection can therefore provide useful information about the actual condition of the entire system. During the planning stage of a roof replacement, homeowners can use inspection findings to understand the expected scope of work and potential additional repairs. A detailed assessment also creates an opportunity to discuss material choices, installation methods, ventilation, drainage, and long-term maintenance.
Choosing Suitable Roofing Materials
Roofing materials differ in appearance, durability, maintenance requirements, installation methods, and cost. Asphalt shingles are widely used because they offer a variety of styles and can provide practical protection. Metal roofing can offer a durable option with a distinctive appearance, while tile and other materials may provide different architectural characteristics. Homeowners should consider the design of the house as well as their budget and long-term maintenance preferences. During roof replacement, selecting materials based only on initial appearance or price may not provide the most suitable result. It is useful to consider expected service life, resistance to environmental conditions, maintenance needs, and compatibility with the existing structure. A balanced material selection can contribute to both the performance and visual appeal of the finished roof.
Preparing the Home Before Construction
Proper preparation can help reduce disruption during the roofing process. Outdoor furniture, decorations, vehicles, and other items near the work area may need to be moved or protected. Inside the home, homeowners can secure fragile objects because construction activities may create vibration and noise. Children and pets should also be kept away from active work areas for safety. A roof replacement can involve several stages, including removal of old materials, inspection of the roof deck, installation of underlayment, fitting of new roofing materials, and cleanup. Understanding these stages helps homeowners prepare their schedules and property accordingly. Clear communication with the roofing team before work begins can also reduce misunderstandings about access, timing, materials, and project expectations.
Removing the Existing Roofing System
The removal stage provides an important opportunity to inspect what is beneath the existing roof. Old shingles, underlayment, flashing, and other deteriorated materials may need to be removed before new components can be installed. Once these layers are exposed, previously hidden damage may become visible. Moisture-damaged decking, weakened structural areas, or deteriorated sections may require additional attention before installation continues. During a roof replacement, addressing these underlying issues is important because new roofing materials should be installed over a stable and properly prepared surface. Homeowners should understand that additional repairs discovered during removal can sometimes change the final project scope. Proper preparation beneath the visible roofing surface can have a significant impact on long-term performance.
Inspecting and Repairing the Roof Deck
The roof deck supports the layers installed above it, making its condition an important part of the overall roofing system. Prolonged moisture exposure, age, inadequate ventilation, or previous leaks can weaken decking materials. Damaged sections may need to be repaired or replaced before new roofing components are installed. During roof replacement, the exposed deck can be inspected more thoroughly than it could be through a simple exterior examination. Repairing compromised areas helps provide a stronger base for underlayment and the final roofing material. Homeowners should ask questions if unexpected damage is discovered so they understand why additional work is necessary. Addressing structural concerns before installation can reduce the likelihood of problems developing beneath the new roof.
Installing Quality Underlayment
Underlayment provides an additional protective layer between the roof deck and the primary roofing material. It can help reduce moisture penetration and provide extra protection in areas that may be vulnerable to water. Different roofing systems may require different types of underlayment, so the appropriate product should be selected according to the installation requirements. Careful installation is essential because gaps, wrinkles, or improperly sealed sections can compromise performance. During roof replacement, the underlayment should be installed consistently across the required areas and integrated properly with flashing and other components. Special attention should be given to roof valleys, edges, penetrations, and other areas where water may present additional challenges. A properly installed underlayment contributes to the overall durability of the roofing assembly.
Paying Attention to Flashing
Flashing helps protect areas where the roof meets walls, chimneys, vents, skylights, and other structures. These transition points can be particularly vulnerable to water intrusion when flashing is damaged or improperly installed. During a roof replacement, old flashing should be inspected carefully and replaced when necessary. Installing new roofing materials around deteriorated flashing may leave potential entry points for moisture. Properly fitted flashing directs water away from vulnerable joints and helps create more reliable connections. Sealants and fasteners should also be appropriate for the specific application. Paying attention to these smaller components can have a major effect on the performance of the entire roofing system because many leaks begin around transitions and penetrations rather than in the middle of an otherwise intact roof.
Improving Roof Ventilation
Proper ventilation helps manage temperature and moisture in attic spaces. Without sufficient airflow, heat can accumulate during warmer periods and moisture can remain trapped during cooler conditions. Over time, these conditions may contribute to deterioration of roofing materials, insulation, and wooden components. A roof replacement provides a useful opportunity to assess the existing ventilation system and determine whether improvements are needed. Intake and exhaust ventilation should be appropriately balanced and coordinated with insulation. Simply adding vents without considering the entire airflow pattern may not provide the intended results. Professional assessment can help homeowners understand whether ventilation changes are appropriate for their roof design. Good airflow can support the longevity of the roofing system and contribute to a healthier attic environment.
Managing Water and Roof Drainage
Effective drainage is essential for preventing water from remaining on the roof or collecting near vulnerable areas. Gutters, downspouts, valleys, and roof slopes should work together to direct rainwater away from the structure. Blocked or damaged gutters can cause water to overflow and potentially affect roof edges, walls, landscaping, and foundations. During roof replacement, drainage components should be inspected for signs of damage or poor performance. Roof slopes should also be reviewed to ensure water can move naturally toward appropriate drainage points. Keeping gutters and downspouts clean after installation is equally important. A well-maintained drainage system can help reduce unnecessary moisture exposure and support the long-term condition of the new roof.
Selecting an Experienced Roofing Team
The quality of installation can influence how well a roofing system performs over time. Homeowners should evaluate experience, workmanship, communication, safety procedures, material knowledge, and the ability to explain the proposed project. A professional roofing team should be able to provide clear information about preparation, materials, installation, ventilation, flashing, and cleanup. During roof replacement, careful workmanship is essential because even high-quality materials can perform poorly if installed incorrectly. Homeowners should feel comfortable asking questions about the project and understanding what is included in the work. Taking time to evaluate potential contractors can help establish realistic expectations. Good communication throughout the project can also make it easier to address unexpected issues if they arise.
Considering Energy Efficiency
Roofing can contribute to the overall energy performance of a home when it is properly coordinated with insulation and ventilation. Certain roofing materials may reflect more sunlight, while appropriate attic insulation can reduce heat transfer. Ventilation can also help manage attic temperatures and moisture. During roof replacement, homeowners may have an opportunity to address deficiencies in these areas rather than focusing solely on the visible roof covering. Energy performance depends on the entire building envelope, so roofing improvements should be considered alongside insulation, ventilation, windows, and other components. A professional can explain how different materials and construction choices may affect the overall system. Thoughtful decisions can contribute to improved indoor comfort and more efficient building performance.
Improving the Exterior Appearance
A roof has a major visual impact because it covers a substantial portion of the home’s exterior. Aging, faded, stained, or damaged roofing materials can make the entire property appear less maintained. New materials can provide a cleaner and more coordinated appearance while improving structural protection. During roof replacement, homeowners can consider different colors, textures, and material styles that complement the architecture. However, appearance should not be the only factor in the decision. Durability, maintenance, installation requirements, and long-term performance should also be considered. Selecting a suitable roofing style can improve visual harmony while ensuring that practical needs remain a priority. A well-installed roof can contribute significantly to the overall appearance and condition of the property.
Preparing for Weather Exposure
A roof must withstand repeated exposure to rain, wind, sunlight, temperature changes, and other environmental conditions. The materials and installation methods should therefore be selected according to the expected demands of the building. Vulnerable areas such as roof edges, valleys, flashing points, and penetrations require careful installation because they may experience increased exposure to water and wind. During roof replacement, proper fastening, sealing, and material placement can help improve resistance to weather-related stress. Homeowners should also understand that even a newly installed roof requires inspections after severe weather events. Prompt assessment can identify damaged materials before moisture has an opportunity to cause additional problems. Preparation combined with ongoing care can support dependable performance.
Understanding the Project Timeline
The duration of a roofing project can vary depending on the size and complexity of the roof, selected materials, weather conditions, preparation requirements, and any unexpected repairs. Homeowners should discuss the expected schedule with the roofing team before work begins. A roof replacement may involve material delivery, removal, deck inspection, repairs, installation, finishing work, and cleanup. Understanding the sequence can make it easier to organize daily routines around the construction. Weather can sometimes affect outdoor work, so the schedule may need to remain flexible. Clear communication about progress can help homeowners understand how the project is developing. Having realistic expectations can make the overall process more manageable.
Managing Construction Debris
Roofing projects can produce a significant amount of debris, particularly when an old roofing system is removed. Shingles, underlayment, damaged decking, flashing, and other materials may need to be collected and disposed of properly. The work area should be organized to minimize hazards and protect surrounding property. During roof replacement, professional crews generally use appropriate methods to collect debris as work progresses. Homeowners should discuss cleanup expectations before the project begins so that responsibilities are clear. At the end of the project, the surrounding area should be inspected carefully for remaining materials or debris. A thorough cleanup helps restore the property and ensures that the completed work area is safe and usable.
Understanding Roofing Costs
The cost of a roofing project depends on many factors, including roof size, material choice, labor, accessibility, structural repairs, ventilation, flashing, and disposal requirements. Homeowners should review estimates carefully to understand what services and materials are included. During roof replacement, additional costs may sometimes arise when hidden damage becomes visible after the existing materials are removed. This is one reason why inspection and clear communication are important before construction begins. A detailed estimate should identify the expected scope of work and any areas where additional repairs could potentially be required. Comparing estimates based on their complete scope rather than only the final price can provide a more useful understanding of overall value. Proper financial planning can also reduce stress during the project.
Maintaining the New Roofing System
Even a newly installed roof requires regular maintenance. Gutters and downspouts should remain clear, drainage should be monitored, and visible damage should be addressed promptly. Homeowners should watch for missing materials, damaged flashing, stains, moisture, or other unusual signs. After roof replacement, professional inspections can help identify developing problems before they become more extensive. Maintenance requirements vary according to roofing materials, building design, and environmental exposure. Following recommended care procedures can help protect the investment and support the expected service life of the system. Consistent maintenance is generally easier and less expensive than waiting until a small problem becomes a major repair.
Protecting the Investment
A roofing project represents a significant investment, so homeowners should take steps to protect the new system after installation. Routine inspections, appropriate cleaning, clear drainage, and prompt repairs can all contribute to long-term performance. Trees and branches should be monitored when they are close enough to contact the roof, while gutters should be kept free of accumulated debris. During roof replacement, homeowners should also keep records of the materials installed and any maintenance recommendations provided by the roofing team. These details can be useful when future inspections or repairs are required. Taking a proactive approach to maintenance can help preserve both the appearance and protective function of the roof. Long-term care is an essential part of getting maximum value from the investment.
Planning for Long-Term Performance
A successful roofing project should be planned with future performance in mind rather than focusing only on immediate installation. Material quality, installation practices, ventilation, drainage, flashing, and maintenance all contribute to the overall service life of the system. Homeowners should consider how much maintenance they are comfortable performing and select materials accordingly. A roof replacement also provides an opportunity to correct weaknesses that may have affected the previous roofing system. Proper documentation and regular inspections can support future maintenance decisions. A well-planned roofing system combines suitable materials with careful installation and ongoing care. Considering these factors together can help create a roof that provides dependable protection for many years.
Making an Informed Decision
Homeowners should gather sufficient information before committing to a major roofing project. This includes understanding the current condition of the roof, available material choices, expected costs, installation requirements, maintenance needs, and potential improvements. Professional advice can help clarify technical matters that may not be obvious to someone without roofing experience. During roof replacement, asking detailed questions can help homeowners understand why certain materials or repairs are being recommended. It is also useful to review the scope of work carefully and ensure that expectations are clearly communicated. An informed decision is based on the overall needs of the property rather than one factor alone. Taking time to understand the project can lead to better preparation and a smoother construction experience.
Conclusion
Replacing an aging or damaged roof is a significant project that can improve the protection, appearance, and long-term reliability of a home. Successful roof replacement requires careful inspection, appropriate material selection, proper preparation, quality installation, effective ventilation, dependable drainage, and ongoing maintenance. Homeowners should understand the condition of their existing roofing system and evaluate whether repairs or a complete replacement provide the more suitable long-term approach. Professional workmanship can help ensure that the roofing components are installed correctly and function together as a complete system. Once the project is finished, regular inspections and maintenance remain important for preserving the roof’s condition. With thoughtful planning and responsible care, a new roofing system can provide dependable protection, improved comfort, and lasting value for many years.

From Ertugrul to the Live Feed from Makkah: How British Muslims Binge-Watch in Ramadan

Foodie Co: Powder Blending and Manufacturing Services

What Is Tikcotech? Features and Uses Explained

Alex Pettyfer Net Worth, Wife, Age, Height, Children, Career and More

Brad Williams Net Worth, Wife, Height, Age, Daughter, Family, Career and More

Eldorado.gg Review 2026: How It Works, Safety, Fees, and Risks
-
Celebrity9 months ago
Alex Pettyfer Net Worth, Wife, Age, Height, Children, Career and More
-
Celebrity10 months ago
Brad Williams Net Worth, Wife, Height, Age, Daughter, Family, Career and More
-
Blog1 month ago
Eldorado.gg Review 2026: How It Works, Safety, Fees, and Risks
-
 Anime11 months ago
Sanzoku Bandits of One Piece: Origins, Higuma, and Their Role in Dawn Island
-
 Celebrity10 months ago
John McGinn Net Worth, Age, Height, Wife, Childrens, Career and More
-
 Celebrity10 months ago
Frances de la Tour Net Worth, Age, Height, Husband, Childrens, Career and More
-
 Celebrity10 months ago
Will Trickett Net Worth, Wife, Childrens, Age, Career and More
-
 Blog2 months ago
Crackstube: A Complete Guide to the Digital Publishing Platform